How to Make Jelly Tart Step by Step?
A well-made Jelly Tart combines a crisp pastry shell, a smooth filling, and a bright layer of carefully set jelly. It looks delicate, yet each part demands control. The dough must remain cold. The filling needs gentle heat. The jelly should shine without becoming rubbery.
Julia Child once said, “A party without cake is just a meeting.” Her playful observation also suits tart making. A Jelly Tart can turn simple ingredients into a memorable dessert. This guide explains how to build one step by step, using practical pastry methods and clear visual cues.
You will learn how to mix and chill the dough, roll it evenly, and line the tart pan without tearing the edges. Small cracks matter. They can leak filling later. The guide also covers blind baking, because a pale or soft crust cannot support a moist center. Watch the filling closely. Overheating may create bubbles or a grainy texture.
The jelly layer needs patience. It should cool slightly before spreading, but not set in the saucepan. A clean spoon test helps. The surface should look fluid, not watery. Refrigeration completes the structure.
Some mistakes are useful teachers. My tart shells sometimes shrink when I rush the chilling stage. That flaw is easy to prevent. Measure accurately, work calmly, and accept that the first attempt may look less polished. Flavor often arrives before perfection. With practice, your Jelly Tart can develop a crisp base, balanced sweetness, and a glassy finish that feels professional.
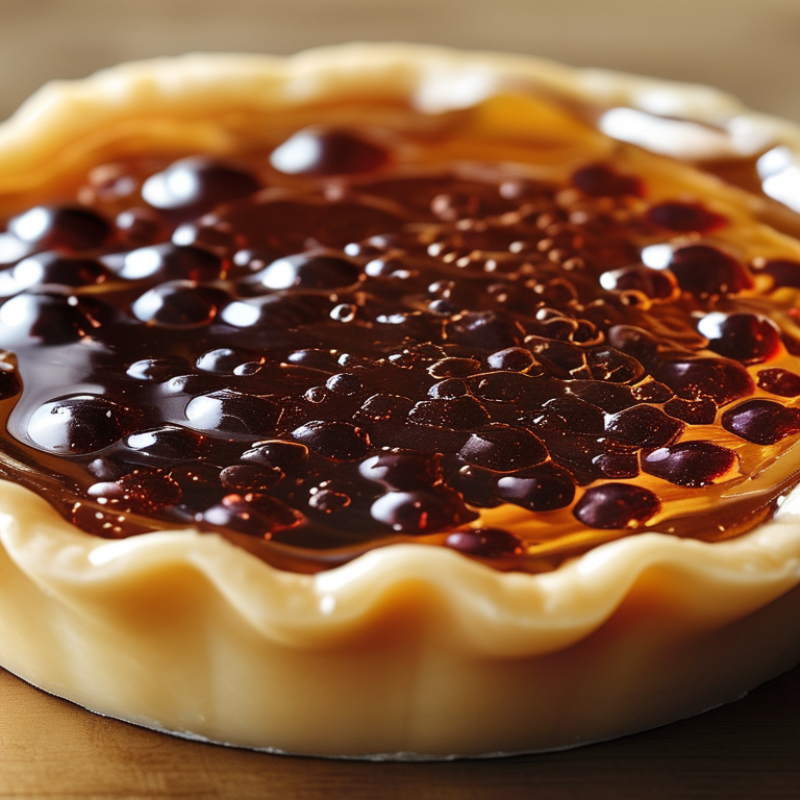
Ingredients, Tools, and Preparation for a Jelly Tart
How to Make Jelly Tart Step by Step?
A jelly tart begins with a crisp pastry shell, smooth custard, and bright fruit jelly. For a 20-centimeter tart, prepare 180 grams of plain flour, 90 grams of cold butter, 45 grams of sugar, one egg yolk, and a pinch of salt. You will also need 250 milliliters of milk, two egg yolks, 45 grams of sugar, 20 grams of cornstarch, and a little vanilla. For the topping, use 300 milliliters of clear fruit juice, 6 grams of gelatin, and sliced strawberries or peaches. Fresh fruit should be washed, dried, and checked for bruised areas.
Prepare a tart pan, rolling pin, baking paper, pie weights, saucepan, whisk, fine strainer, and pastry brush. Keep the butter cold. Rub it into the flour until the mixture resembles coarse crumbs. Add the yolk and form a soft dough without kneading too much. Chill it for 30 minutes. I sometimes rush this step, and the crust shrinks. That mistake is avoidable.
Roll the dough evenly, then press it into the pan. Prick the base with a fork, cover it with baking paper, and add pie weights. Bake at 180°C until golden, usually 20 to 25 minutes. Cook the custard over low heat, whisking constantly, then strain it before filling the cooled shell. Bloom the gelatin in cool water, warm it gently with the juice, and never boil it. Arrange the fruit carefully. Pour the jelly slowly, then refrigerate the tart for at least four hours. Check the center before slicing.
How to Make Jelly Tart Step by Step? - Ingredients, Tools, and Preparation for a Jelly Tart
| Category | Item or Step | Quantity or Setting | Preparation Details |
| Ingredients | Plain sweet biscuits | 200 g | Crush into fine crumbs to form the tart crust. |
| Unsalted butter | 90 g, melted | Mix with biscuit crumbs until evenly moistened. |
| Powdered gelatin | 14 g | Use approximately 7 g for the creamy layer and 7 g for the jelly topping. |
| Cold water | 90 ml | Divide into two portions to bloom the gelatin. |
| Cream cheese | 400 g, softened | Blend until smooth before adding the other filling ingredients. |
| Granulated sugar | 80 g | Adjust slightly according to the sweetness of the fruit and juice. |
| Fruit juice and fresh fruit | 120 ml juice; 250 g fruit | Use clear juice for the topping and sliced berries, peaches, or kiwi for decoration. |
| Tools | Removable-bottom tart pan | 23 cm diameter | Makes it easier to release the chilled tart without damaging the crust. |
| Food processor or rolling pin | 1 | Use to crush the biscuits into uniform crumbs. |
| Mixing bowls | 2 to 3 | Prepare separate bowls for the crust, creamy filling, and jelly mixture. |
| Measuring scale and jug | 1 each | Accurate measurements help the gelatin set properly. |
| Small saucepan | 1 | Warm the bloomed gelatin gently; do not boil it. |
| Spatula and whisk | 1 each | Combine ingredients smoothly and spread the filling evenly. |
| Step-by-Step Preparation | 1. Prepare the pan | 5 minutes | Lightly grease the base and sides of the tart pan, or line the base with parchment paper. |
| 2. Make the crust | 10 minutes | Combine biscuit crumbs with melted butter. Press the mixture firmly over the base and sides of the pan. |
| 3. Chill the crust | 30 minutes | Refrigerate until firm. A well-chilled crust is less likely to crumble when filled. |
| 4. Bloom the gelatin | 5 to 10 minutes | Sprinkle gelatin over cold water and leave it undisturbed until softened. |
| 5. Prepare the creamy filling | 10 minutes | Beat cream cheese and sugar until smooth. Warm half of the bloomed gelatin gently, then mix it into the filling. |
| 6. Fill and chill | 2 hours | Pour the filling over the crust and refrigerate until set before adding fruit. |
| 7. Add fruit and jelly | 15 minutes | Arrange fruit on the set filling. Combine the remaining gelatin with warm juice and pour it gently over the fruit. |
| 8. Final setting | At least 4 hours | Refrigerate until the jelly is firm. For the cleanest slices, chill the tart overnight. |
| Key Checks | Gelatin temperature | Warm, not boiling | Boiling can reduce gelatin’s setting ability and may affect the texture. |
| Crust texture | Firm and compact | Press evenly, especially around the edges, to prevent cracking. |
| Filling consistency | Smooth and lump-free | Allow softened cream cheese to reach room temperature before mixing. |
| Serving condition | Well chilled | Cut with a warm, dry knife and refrigerate leftovers promptly. |
| Estimated Total Time | Approximately 7 hours | Includes preparation, chilling, and final setting time; active preparation takes about 45 minutes. |
Assembling the Tart in Clear Steps
Making a jelly tart becomes easier when each layer has a clear job. Start with a fully baked tart shell and let it cool completely. A warm shell can soften the filling and create a weak base. Spread a thin layer of pastry cream across the bottom, stopping about one centimeter below the edge. Smooth it with a small spatula. Add sliced fruit in overlapping circles, keeping the pieces dry with a paper towel. This small step improves the final texture.
Prepare the jelly according to a tested recipe, then let it cool until slightly thickened. It should feel warm, not hot. Pour it slowly over the fruit, beginning at the center and moving outward. Use only enough jelly to cover the fruit lightly. Too much can hide the colors and make each slice slippery. I once poured it too quickly, and the fruit shifted toward one side. It still tasted good, but the tart looked uneven.
Chill the tart for at least two hours. The surface should feel firm when touched gently. Run a warm, dry knife around the edge before removing the tart ring. Cut with a clean knife, wiping the blade after every slice. If the jelly stays soft, the mixture may need more setting time or a more accurate ingredient measurement. Check the center before serving.
How to Make Jelly Tart Step by Step? — Assembling the Tart in Clear Steps
The chart shows a practical time plan for assembling a jelly tart. Cooling the crust and allowing the jelly to set require the most time, while spreading the filling and adding decorations are comparatively quick steps.